Showing posts with label cake decorating. Show all posts

Thursday, August 13, 2015

Ninja Turtle Cake


This is the (techinically second) ninja turtle cake I made.  I LOVED it, and my Godson loved it as well ( I guess that's what matters since it is his cake - huh? lol).

I had known about this cake for a while (lets say about 3 months or so), but the original idea was something like this (this is what his mom sent me that she/he wanted):


My Godson said like this but without the turtles looking like "babies" he wanted something more like the new movie turtles (WHAT?! I can't do that!)

So checking in on the order, I asked if the plan was still the same, for about how many people, flavors, etc.  So then it turns out they now wanted a half sheet cake.  WHA....???  How do I get that image out of my head, or how do I convert it to a half sheet??  It took some surfing the web (pinterest, google, and cake central to be exact) to finally lay down an idea for what I wanted.

The actual cake itself is my handy, go to, chocolate cake recipe I used in the "My Little Pony" (you can find the link to the recipe there) and vanilla/white cake - I used the White Velvet Cake recipe reviewed here.  I've actually been thinking of tinkering with chocolate cake recipe to mimic more of Gretchen's recipe for chocolate cake.

As far as the actual turtles go, I bought them online (Amazon Prime - seriously, if you haven't tried it, it's one of the best things ever!  Then they offered a credit line, and then I went a little back to school shopping happy, and yea.... well that's a different story, lol).

The frosting was the Swiss Meringue Buttercream (plus a mix of other vanilla buttercreams I had made.  I basically combined them all - delicious!).  The cake was half chocolate, half vanilla (similarly frosted :))

All the fondant decorations were made the night before (I still tried to salvage my doomed fondant from the "My Little Pony" cake... TRIED!).  It somewhat worked.  So, I also made a pizza, because, well if you're a TMNT fan, you know PIZZA is staple.  I must say this, this down here was my favorite part of the entire cake!  I loved how it turned out.  It was miniature and a small detail.  But it you look carefully at the finished cake pictures, you can see the different pizza slices scattered around the ninja turtles:

How awesome is that? 

I was very proud of myself :) And, it was that horrible fondant! lol.  Below are the rest of the cake pictures.  I normally try and make the font of the "Happy Birthday" stay in theme and I think that I did a pretty good job here as well.  Thanks you guys for looking, feel free to comment below, and take care :).


If you noticed, I used ninja turtle duct tape to make the border of the board :) told you I enjoyed it!

Read More »

Monday, July 13, 2015

My Little Pony Cake

This weekend I had a challenge with this cake.  I'm overall satisfied with the cake, however, I know that it's not the original plan I had.


It all happened when the top tier ended up lopsided. : /... Never a good thing.  Then, the sprinkle method I decided to used didn't go as great as expected.  Finally, my fondant that I wanted to use to cover the bottom tier was all dry and crumbly - then I had no way of salvaging it (trust me, I tried).

However, with all that, I'm still satisfied - could have been better but happy with all that happened.

Recipe time!! So, the cake itself is CHOCOLATE! This is the best chocolate recipe I have found and everyone loves it!! Coffee is it's secret ingredient!! (Just like the red velvet recipe I use ;) ).  The title of this recipe is actually "The Best Chocolate Cake."  Click the link to find the recipe.  Here are a few pictures of the process.

I don't use the "King Arthur Flour Black Cocoa" and it's still great, so this is definitely optional.  The cake is so moist and chocolaty, definitely for chocolate lovers.
Sift the flour first.  So easy to do it on parchment paper!


Here is what I mean about spooning to measure the flour.  Remember, you don't want "packed" flour.

 
All the dry ingredients mixed together

Buttermilk, eggs, and vanilla all mixed together in my Pyrex cup.


Once I beat in the buttermilk mix with the dry ingredients.  Note, I do the coffee second since I use my Pyrex cup for this (maybe soon I'll invest in a second measuring cup :) )

The coffee mixed in the measuring cup (I don't really clean out the buttermilk first - it all goes in the same place! lol)  Notice the batter is now very runny - this is ok, no worries!


Finished cakes!! So, My middles usually sink in, anyone know why?  Do they need to stay in longer - then I'm afraid they'll burn or be too dry.

Also, I used deeper pans so more batter in each pan I use the Wilton chart for help on this.  The recipe itself make about 5 1/3 cups of batter.  I made the recipe 3 times.  Took about 40-45 to bake up.


My homemade cake drum!  I use Elmer foam board and measure the cake pan to make the circle.  This one is 4 boards taped together then wrapped in cake foil.  Then it needed to pop, so I found this duck tape I bought on clearance a while ago.  It definitely did the trick (I may do this more often!)


 I tried to make a marshmallow fondant (this is the dry one I made : /).  Maybe it didn't work out because the marshmallows were store brand and a little old.  I'll try the recipe again with better marshmallows, maybe it'll do the trick.  If it does, I will definitely post that recipe up later.

I then made this buttercream recipe and chocolate buttercream recipe.  I love the chocolate buttercream recipe because its so simple and I've gotten a few compliments on it so I'll stick to it.  I also recently discovered it can also be made with white chocolate (next time I'll try this!!).  This was a new buttercream recipe I was trying out.  I always feel homemade buttercream has too much of a gritty - powdered sugar taste. Kids love it though.  I'm just trying to find one that is more "store like."  I guess I'll stick with store kind or keep trying different ones.  If you have any that you love, leave a comment below. :) Wish I remembered to take pictures of the chocolate buttercream process, it's actually pretty cool.  But check out the link for pictures there.  I did take on of the buttercream though. Enjoy!
This was quite fluffy and creamy.  The birthday girl, however, said it was yucky.  She wanted ALL chocolate.  Her brother said it was good as gold. Go figure lol.  


What do you think?  Comment below.  I've also discovered I a lot better at "girly" cake than little dude cakes.  This weekend I get to work on ninja turtle cake.  Wish me luck!

Enjoy! and comment below :)


Read More »

Monday, July 6, 2015

Swiss Meringue Buttercream

So, I've been watching her for a while and tried a few of her recipes - vanilla cake; strawberry cake - but not much success.  She owned a bakery and got great comments, so I think I must have done something wrong.  This time, I wanted to try her buttercream recipe.  It came out nice and fluffy, however, it isn't your normal american buttercream, and it does taste a little "greasier" I guess you could say.

In my family, only one of my sister's commented on the taste of the icing.  However, she did eat it, lol.  No one else said anything.  So maybe it's just us :)

Now, don't get me wrong, it still tastes like icing, but with that different, sort of "greasy" taste.  I am, however, pleased with the texture of the buttercream.  You can find her recipe here, along with all her other recipes and links to her YouTube videos.  Because she does have YouTube videos explaining step by step, I won't go into detail on the steps.  I just wanted to show you the pictures I got from making it at home, and the way it looks.

If anyone can help me figure out how not to make it greasy-tasting, feel free to leave a comment and help me out :).  If you have a different recipe, also let me know!

These are the egg whites before mixing in the sugar.  You can see the sugar in the bowl lol.


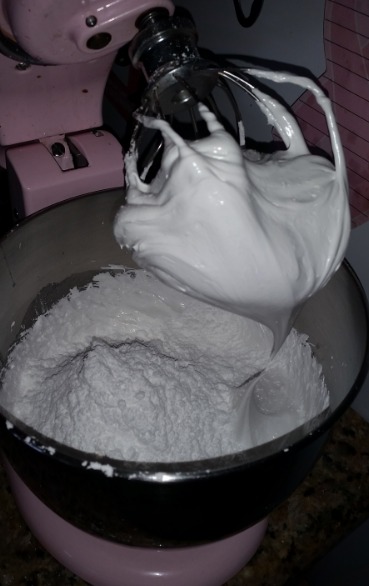
After mixing in the confectioners sugar (still looks really glossy and fluffy :) )

After chunking in the butter and shortening (as she states).  It didn't curdle!! YAY! (that's a win for me.  I've made other meringue buttercream when it does curdle and it freaked me out!)


After mixing with the paddle.
Note, this would have been enough to do some nice decorations on my cake, but I had 2 cakes (remember).  Had it just been one cake, I would have had fun with that! :)

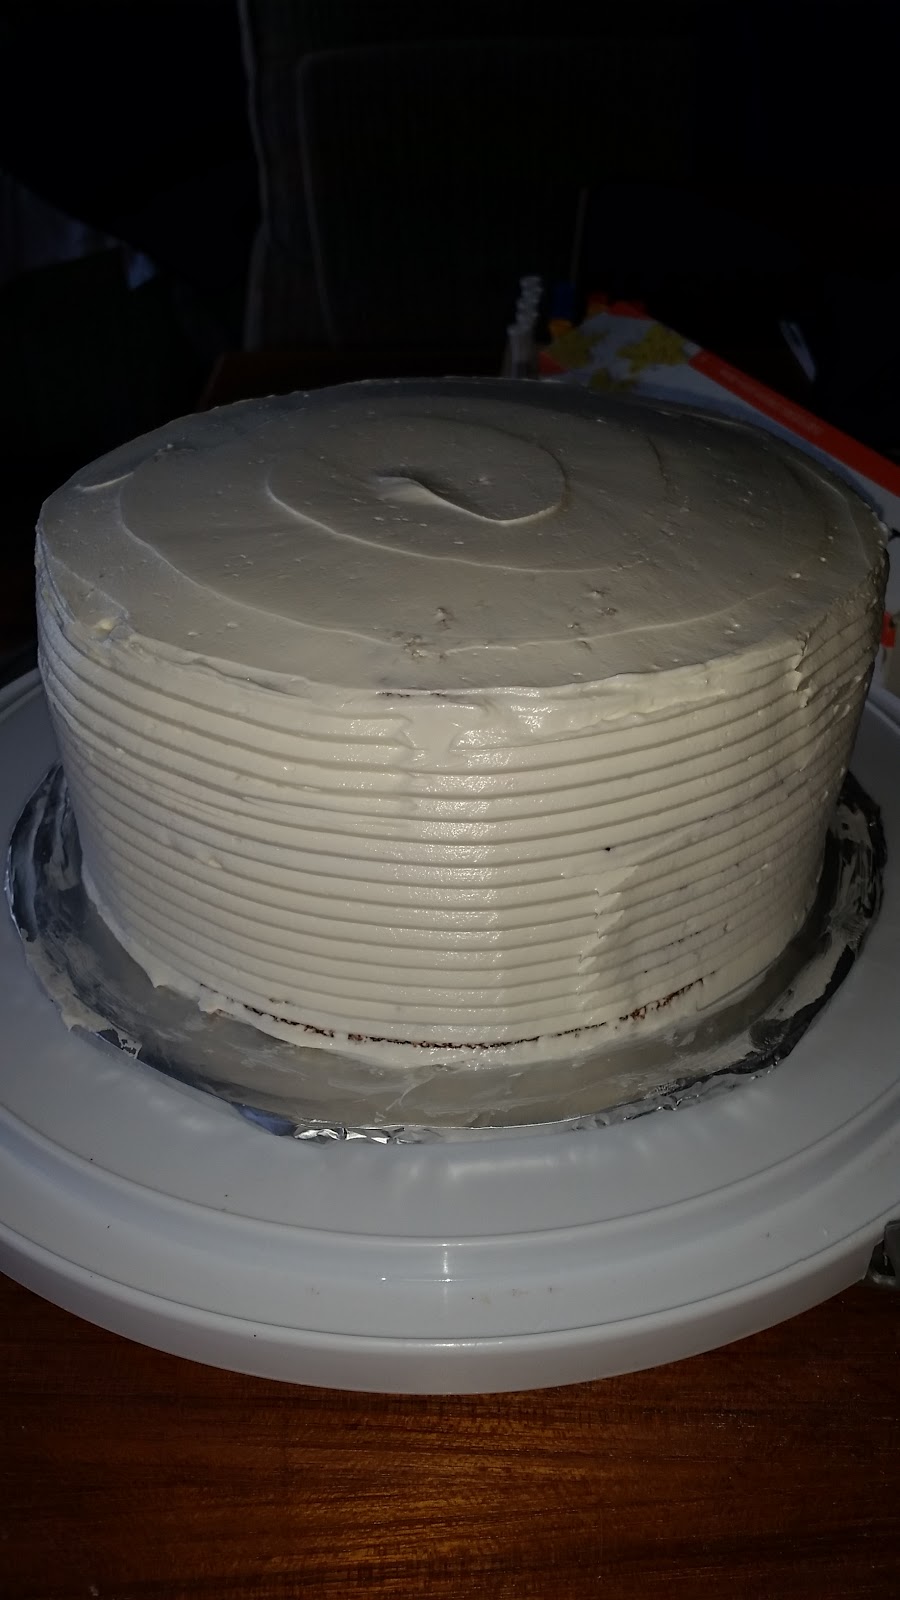
My final product.

Leave comments below, let me know what you think! Enjoy!!  Check out this cake on the inside!
Read More »

White Velvet Cake

So we've had red, we've had blue, why not make it white?  AND, I've been searching FOREVER for a white/vanilla cake recipe that is moist and crumbly, and I have to say this batter really nailed it!  Family enjoyed it as well.

I had tried another white cake recipe before with buttermilk (again, thinking this was the key to MOIST cake) and bleh! Cake was dense, mushy, and bleh!  I repeat, bleh.  So with this recipe, I was happily surprised.  Cake came out looking fluffy, crumbly, and moist.  Plus, my mother was very pleased (she's a hard woman to please!) Look!
Again, these were the leftover scraps - used to make another Flag cake :)


Then this is what happens when you have one dark pan and one light one.  I need to invest in SAME PANS!!

But, anyway, find the original recipe here, and keep reading for how I attacked this "bad boy."  Pictures are included, including how "fluffy" the oil/shortening actually gets!

First thing is first - DRY INGREDIENTS.  I sifted them together.  But first I sifted the flours separately before measuring.

I said this on the Red Velvet post, spoon your flour into the measuring cups to measure.  DO NOT pack flour into measuring cups.  This method make lighter - fluffier - cakes. :)
  • 1 1/4 cups of sifted all purpose flour
  • 1 1/2 cups of sifted cake flour
  • 1/2 tsp of baking soda
  • 1 1/2 tsp of baking powder
  • 1 tsp of salt
  • 1 1/2 cups of granulated sugar


Next, beat together at high speed the vegetable oil, vanilla, and shortening until fluffy.
  • 2/3 cup of vegetable oil
  • 1/3 cup of vegetable shortening at room temperature
  • 3 tbsp of good quality vanilla extract (for WHITE cake, get clear extract)


My thought - fluffy?  What is fluffy, how long do I do this?  Look at the pictures below for a description.

This was after 5 minutes.  Well it became thick and pale, not so fluffy : /.  I was about to stop here not knowing if this is what the "fluffy" part meant.  I thought about it and decided to keep the mixer going for another 5 minutes to see if it would get "fluffier." Sure enough, it did! So I let it go for a couple minutes longer to see how "fluffy" it would get.

This is fluffy!  It will get here, no worries (after about 10-12 minutes)

You will then beat in the eggs, one at a time.
  • 3 large eggs
Don't know if you've already heard this, but make sure your ingredients are all at room temperature.  My eggs had already been sitting out for a bit so they were at room temperature.

Still fluffy-ish :)

Lastly, alternate between dry ingredients and buttermilk - folding after each incorporation.  Start and end with the dry ingredients.


 The batter is a nice and thick.

Pop this into the 325 degree oven for about 30 - 35 minutes.  My pans were two 8 inch pans.  The cake came out quite nice and fluffy itself!

Enjoy!! Comment below with your experience, don't forget to check out the other velvet cake recipes that went into making the Fourth of July Flag cake :)  (Red and Blue)

Read More »

Blue Velvet Cake

BLUE!! Not red, but BLUE!  I've tried "purple" velvet (following the exact same red velvet recipe but purple food coloring - eh, not so great, looked black, but not an appetizing looking black.  LOL.  But that, my friends, is a different story).  I knew the red velvet recipe was going to be one of the recipes I used, so why not make the rest of my flag cake a velvet cake.  My next task was to find a blue velvet cake recipe, so off to Pinterest I went (surprise, surprise!).  This was going to be a first time for me, but hey what better way to test a recipe than with my family (best taste testers and so very honest!).

After searching for all of 5 minutes (I know, I like to do better research, but I was at a time crunch.  I was looking for one that resembled the already amazing red velvet recipe, this was the closest one - I thought), I found this dandy little recipe here.

Here is my experience with the recipe.  Again, I didn't taste my final product, but my family did and they loved it.  However, I will say this, out of the three cake flavors that I made that day, the Blue Velvet did appear to be the most "dry" one.
This is how the cake looks at the end (these were the leftover parts - I used to make a second cake :) )

First, you need to cream together the Crisco (shortening), sugar and eggs.
  • 1/2 cup of Crisco
  • 1 1/2 cups of granulated sugar
  • 2 eggs


It will look a little grainy from the sugar - NO WORRIES :)


Second, make a "paste like mix" with the cocoa powder and blue gel paste (and the two-three drops of violet paste).  

This actually proved to be a little difficult.  I actually added a few drops of buttermilk to loosen it up some.
  • 1 ounce of Royal Blue gel paste coloring
  • 2-3 drops of Violet Blue gel paste coloring
  • 2 tbsp of cocoa powder

This was very thick and dark!
By the way, this is the food coloring I used (Wilton) and this is the size of the one ounce jars.  I had to look this up because I couldn't find the measurement on the jars.  I like to use Wilton as well. 

Add this "paste" to your Crisco mix.

Still looks grainy.

You will then add the salt, flour with the buttermilk and vanilla.
  • 1 scant tsp salt
  • 1 tsp vanilla
  • 2 1/4 cups of all purpose flour
  • 1 cup of buttermilk


I interpreted this as - add the salt, flour, buttermilk, and vanilla and mix.

Lastly, alternate in adding baking soda and vinegar (no, you're not making a volcano - lol) into your batter.  Just blend I folded, do not beat!
  • 1 tsp of baking soda
  • 1 tbsp of vinegar

The final batter!

Bake at 350 for 25 - 30 minutes.  I baked mine in 8 inch pans.

The finished "bread" is the first picture, so you can see what it looks like on the inside.  Again, this was used for my "flag" fourth of July cake.

Be sure to check out the other velvet recipes (Red and White)

Enjoy and comment below with you experience with this cake :)
Read More »